If you’ve been tempted to try homemade sourdough bread but felt intimidated by starters, schedules, or mysterious baker’s jargon, you’re in the right place. This guide translates bakery methods into a practical home routine, so homemade sourdough bread becomes a weekly habit rather than a weekend science project. Along the way you’ll learn why flour choice matters, how temperature shapes flavor and texture, and which tools save time without costing a fortune. The goal isn’t perfection on day one; it’s a repeatable process with clear checkpoints, so each loaf teaches you something and tastes good in the process.
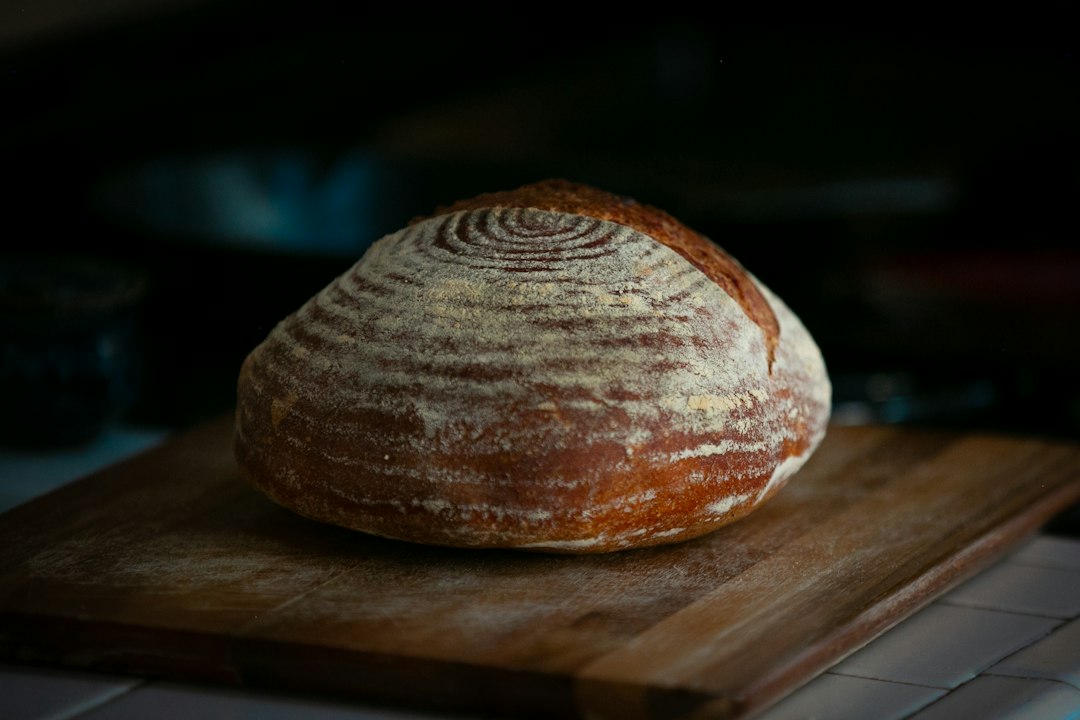
Whether you bake in a compact apartment kitchen or on a well-worn farmhouse counter, you can scale and adapt these steps. Where it helps, you’ll find checklists, side-by-side comparisons, and troubleshooting notes written for real life—busy schedules, fluctuating room temps, and the occasional rushed evening. If you want more Food and Drink ideas and warm kitchen stories, visit LJ Life for inspiration and practical tips.
homemade sourdough bread: Homemade sourdough bread basics
At its core, sourdough bread is flour, water, salt, and time. The fermentation is driven by a culture of wild yeast and lactic acid bacteria suspended in a paste called a starter. That culture raises the dough without commercial yeast and contributes the complex aromas many of us love. While the phrase “naturally leavened” sounds romantic, the process is predictable once you control a few variables: starter strength, dough temperature, fermentation time, and oven environment. In other words, consistency comes from a simple feedback loop—observe, adjust, note, repeat.
There’s no single “right” timeline. Home bread thrives when the schedule fits your life. Many bakers mix at night, proof cold in the fridge, and bake the next morning. Others bulk-ferment during the day and bake after dinner. This guide will highlight timing ranges and the signs your dough is ready for each stage. When in doubt, trust the dough more than the clock: look for volume, feel for elasticity, and pay attention to aroma.
Finally, sourdough is forgiving. Small variations in hydration or timing rarely ruin a loaf; they just nudge the final crust, chew, and tang. With each bake you’ll learn what your flour likes and how your kitchen climate behaves across seasons. Keep a simple log—date, flour, hydration, room temperature, fermentation time, and one or two notes—and you’ll improve far faster than by chasing a perfect recipe screenshot.
Essential tools and workspace setup
You don’t need a professional deck oven to make excellent bread at home. The following tools strike a helpful balance between effectiveness and cost. Invest gradually and upgrade when you feel the bottleneck in your process. If your budget is tight, start with the essentials in the first list and grow from there.
- Kitchen scale: Non-negotiable for consistent hydration and salt levels. Target 1 g resolution and a platform large enough for bowls.
- Mixing bowl or tub: Transparent tubs are helpful for tracking rise and dough strength. A straight-sided container simplifies volume reading.
- Dough scraper: A flexible bowl scraper keeps hands clean and dough together. A metal bench knife helps with dividing and shaping.
- Proofing basket (banneton) or lined bowl: Supports dough during the final rise. A tea towel dusted with rice flour in a bowl works fine.
- Razor or bread lame: A sharp blade enables clean scoring. In a pinch, a new utility blade or sharp paring knife works.
- Baking surface and steam setup: Dutch oven, steel, stone, or an inverted heavy sheet pan with a steam plan (more on this later).
- Thermometer: An instant-read thermometer helps check dough and water temperatures; an oven thermometer checks your oven’s truth.
Arrange your workspace for a smooth flow: scale and water near the flour; scrapers within reach; proofing baskets dusted before shaping. Clear a shaping zone (wood, laminate, or stainless all work), and keep a tiny bowl of water to moisten hands if dough is sticky. A lightly oiled counter can help high hydration doughs; rice flour on the surface gives more glide for pre-shapes and final shaping.
Clean-up strategy matters, especially for weeknight bakes. Keep a small bin or bowl dedicated to dough scraps, let them dry, and dispose before washing to avoid sticky sink clogs. Wipe bowls with a damp cloth, then wash. If your kitchen is cool, plan a warm spot for bulk fermentation, like above the fridge, inside the oven with the light on, or near a mild heat source.
Flour, water, salt: ingredient decisions that matter
Flour: Bread flour builds strong gluten and offers volume and chew, while all-purpose flour lends tenderness. Many home bakers blend bread and all-purpose (for example 70:30) to balance structure with a relaxed dough that’s easier to shape. Whole grain flours (whole wheat, spelt, rye) add flavor and nutrients and speed fermentation because of their enzymes and minerals. Start with 10–20% whole grain and adjust based on taste and dough behavior.
Water: Stick to cool or room-temperature water for mixing, then adjust based on season. Warmer water boosts fermentation; cooler water slows it down. If your tap water is heavily chlorinated, filter it or leave it in an open container overnight so chlorine dissipates. Hydration is a major lever: 70% yields a manageable dough for beginners; 75–78% gives a more open crumb once you’re comfortable; above 80% demands confident handling.
Salt: Typical bakers’ percentages for salt sit around 2%. Salt strengthens gluten, moderates fermentation, and sharpens flavor. Dissolve it fully during mixing or incorporate after a short autolyse (rest). Avoid iodized table salt’s sharpness if possible; sea or kosher salt distributes well. Weigh it—tiny differences in salt significantly affect taste and fermentation pace.
Optional enrichments: A spoonful of olive oil softens crust; a touch of honey rounds acidity; seeds add crunch and aroma. Add-ins influence hydration and timing: seeds can be soaked (“soaker”) to avoid pulling moisture from the dough; sweeteners can accelerate browning, so monitor bake color closely.
Building and caring for a natural starter
A starter is a living culture built from flour and water. If you’re new, plan a week to establish it, and remember that consistency—steady feedings, similar temperatures—is your friend. Here’s a simple schedule using equal parts flour and water by weight.
- Day 1: Mix 30 g whole wheat flour and 30 g water in a small jar. Cover loosely and keep at 24–26°C (75–79°F) if possible.
- Day 2–3: Add 30 g all-purpose flour and 30 g water daily, stirring vigorously. You may see bubbles or a rise dip cycle; aromas shift from floury to lightly fruity.
- Day 4–5: Begin discarding half before feeding. Switch to a 50:50 mix of bread and all-purpose flour. Maintain a paste-like consistency; too thick slows activity, too thin weakens structure.
- Day 6–7: Watch for a pattern: the starter doubles or more in 4–8 hours at room temp, smells pleasantly tangy, and collapses slightly at peak. That’s a bake-ready culture.
Ongoing routine: If you bake daily, feed twice a day at room temperature. If you bake weekly, store the jar refrigerated, feeding once a week and a day before baking give one or two room-temperature feedings to prime. Keep the jar walls clean, use a rubber band to mark volume, and label feeding time to understand the rise curve.
Starter consistency and strength tests: A mature starter holds fine bubbles, rises predictably, and smells mildly lactic without harsh or solvent-like notes. The spoon “float test” can mislead; rely more on predictable rise and peak timing. If the starter sours sharply or lags, give a couple of warm, frequent feeds and refresh with a small portion of the old culture plus fresh flour and water. Changing a portion of the flour to whole grain often perks up sluggish cultures.
Hygiene and storage notes: Use clean utensils and jars. Avoid letting old dried starter clump along the sides; scrape it down after feedings. If you notice unusual colors or off-aromas that don’t resolve with refreshment, it’s safer to restart a small culture from an earlier, robust sample. In practice, steady routines keep your culture lively with minimal drama.
Mixing methods, autolyse, and gluten development
Base formula (one medium loaf): 500 g flour (80% bread, 20% whole wheat), 360–375 g water (72–75% hydration), 10 g salt, 90–100 g ripe starter at 100% hydration. Adjust to your climate and comfort. Warmer kitchens or higher whole grain ratios may call for slightly cooler water or slightly less hydration.
Autolyse: Combine flour and most of the water (reserve 20–30 g) and rest 20–60 minutes. This hydration rest allows flour to absorb water and enzymes to start gluten formation. The dough becomes more extensible with minimal effort, making mixing easier and improving crumb.
Adding starter and salt: After autolyse, mix in your ripe starter until well distributed, then sprinkle in salt dissolved in the reserved water. Gentle kneading, stretching and folding, or the “Rubaud” method builds strength without mechanical mixers. Aim for a cohesive dough that no longer tears immediately when stretched but still feels soft and elastic.
Strength-building options: During early bulk fermentation you can use sets of stretch-and-folds every 20–30 minutes, coil folds for wet doughs, or a few slap-and-folds for quick strength. Stop once the dough feels resilient, smooth on the surface, and holds shape between sets. Overworking yields tight crumb; underworking leaves a fragile structure that spreads.
Bulk fermentation: time, temperature, and dough strength
Bulk fermentation is the first rise after mixing and the stage where most gas production and flavor development happens. It’s driven by temperature and inoculation (how much starter you added). A warmer dough ferments faster; a cooler dough, slower. Bakers watch dough temperature more than room temperature because friction from mixing, water temperature, and ambient conditions all combine into the dough’s actual thermal environment.
Target dough temperature: 24–26°C (75–79°F) is a sweet spot for many home bakes. Use warmer water in winter and cooler in summer to land near this range. If your dough races ahead, move it to a cooler space or shorten bulk; if it lags, a slightly warmer spot quickens it.
Signs bulk is complete: Volume increases by roughly 50–75% (not necessarily doubles), surface turns slightly domed and glossy, bubbles appear along the container. When you gently jiggle the tub, the mass quivers like a set custard. A poke leaves a slow-rebounding indentation. Bulk length varies—typically 3–6 hours—depending on starter strength, flour, hydration, and temperature.
Mid-bulk folds: Early folds build structure and redistribute temperature and nutrients. Perform 2–4 sets in the first half of bulk. Stop folding once the dough resists and holds tension; additional folds later can degas excessively and tighten crumb.
Balancing flavor and schedule: Longer, cooler bulk ferments often yield deeper flavor and a broader window for shaping. If your day is packed, bulk for 2–3 hours at room temp, perform a gentle pre-shape, rest, final shape, and then proof cold overnight in the fridge. The fridge (2–5°C / 35–41°F) slows fermentation significantly, letting you bake on your timeline with good structure.
Shaping, proofing, and scoring with confidence
Pre-shape: Turn the dough onto a lightly floured or barely oiled surface. Using a bench knife, tuck and rotate the dough to form a loose round. Rest 15–30 minutes (bench rest) to relax gluten. This pause makes the final shape cleaner and reduces tearing.
Final shape: For a batard (oval), gently pat the round into a rectangle, fold the top third down, bottom third up, then roll tightly from the top, sealing with your thumbs. For a boule (round), tighten by tucking edges under while rotating. Maintain internal gas; avoid heavy degassing. Place seam-up in a well-dusted banneton or lined bowl.
Proofing: Proof at room temp until the dough has visibly expanded and passes the “poke test” softly, then cold-retard to fit your schedule and develop crust color and flavor. Many home bakers proof primarily in the fridge (8–16 hours). Cold proofing makes scoring cleaner and loading easier.
Scoring: Scoring controls expansion and creates an ear (the lifted crust flap). Chill the dough briefly if it’s very slack. Use a razor held shallowly (about 30°) for a long batard score; a deeper, centered cross suits a boule. Commit to a swift motion; hesitation drags dough. Decorative secondary cuts can be added, but one dominant score ensures structural control.
Baking setups: Dutch oven, stone, steel, and steam
Bread needs two things in the oven: strong heat and initial steam. Heat drives oven spring; steam keeps the crust supple so the loaf can expand before setting, and later contributes to gloss and blistering. Here are home-friendly options with pros and cons.
- Dutch oven (cast iron or enameled): A favorite for beginners and experts because it traps steam naturally. Preheat the pot at 230–250°C (450–480°F) for 30–45 minutes. Bake covered 20–25 minutes, uncover 15–25 minutes to finish color. Pros: consistent spring, simple workflow. Cons: heavy to load, limited to one loaf at a time.
- Baking steel or stone: Excellent heat transfer and multiple loaves possible. Preheat thoroughly (at least 45–60 minutes). Introduce steam by placing a preheated pan with boiling water on a lower rack, or use rolled towels in a pan as a slow steam source. Pros: crisp bases, flexible capacity. Cons: more hands-on steam management.
- Inverted sheet pan: Budget-friendly alternative. Preheat an upside-down heavy pan for a flat loading surface. Create steam with a pan of boiling water as above. Pros: low cost, surprisingly effective. Cons: less heat mass, slightly reduced spring.
Loading and temperature management: Load from a parchment sling or directly from a peel. Aim to bake to deep caramel color; pale loaves often taste underdeveloped. Typical internal temperature for a lean sourdough loaf is 96–99°C (205–210°F), but color and aroma are better signals for doneness than numbers alone. If bottoms scorch, lower the oven rack or reduce baking steel preheat or temperature slightly. If crust is too soft, extend bake 5–10 minutes with the oven door cracked to drive off moisture.
Timing template (Dutch oven example): Preheat to 250°C (480°F); load, cover, and bake 22 minutes; reduce to 230°C (450°F), uncover and bake 18–22 minutes; cool fully before slicing. Modify to taste and to your oven’s quirks. Keep notes—the pattern will quickly become second nature.
Troubleshooting common issues
Baking teaches through little mismatches between intent and result. Use the table-like guidance below as a map to interpret symptoms and choose adjustments. One change at a time helps you learn cause and effect.
Loaf spreads or looks flat: Dough may be underdeveloped, overhydrated for your handling comfort, or overproofed. Solutions: build a bit more gluten with an extra early fold, reduce hydration by 1–2%, or shorten bulk by 15–30 minutes. Cold proofing can also help structure by firming the dough before baking.
Tight crumb or little oven spring: Often a sign of insufficient fermentation, weak shaping tension, or overly aggressive degassing. Solutions: bulk slightly longer until bubbles and softness increase, practice gentle shaping that builds surface tension, and preserve interior gas. Consider increasing hydration modestly once handling improves.
Large tunnels or uneven alveoli: Strong folding late in bulk or inconsistent shaping can trap big gas pockets. Solutions: stop folding earlier, even out pre-shape and bench rest, and move gas toward the surface during final shape with light pressure rather than punching down.
Gummy or underbaked interior: Bake longer, and allow a full cool-down before slicing; warm loaves appear wetter. If the crust overcolors before the interior finishes, lower the oven temperature 10–15°C (25°F) and extend bake time. Verify your oven’s calibration with a thermometer; many ovens run hot or cool.
Bitter or harsh acidity: Shorten total fermentation, keep dough a touch warmer during bulk to encourage balanced acid production, or refresh your starter more frequently. Whole grain proportions and long cold proofs increase tang; adjust according to taste.
Scoring tears in odd places: Dough may be underproofed (tight crust) or overproofed (weak structure). The long score may have been too shallow or misplaced. Proof a little longer next time, or chill the shaped dough to firm up before scoring. Aim your main score where the loaf can naturally expand—usually along the centerline for a boule or off-center for a batard.
Flavor variations and dietary-friendly tweaks
Whole grain blends: Try 10–30% whole wheat for nuttiness, 10% rye for earthy sweetness, or a seed mix of toasted sesame and sunflower for aroma and crunch. Increase hydration slightly to accommodate thirsty grains and seeds. Soak seeds in warm water (equal weight) for an hour to keep them tender.
Add-ins: Olives and rosemary (Mediterranean profile), cheddar and jalapeño (savory heat), walnuts and dried cranberries (holiday vibe). Fold extras after initial strength-building to avoid tearing gluten early. Keep total add-ins to 15–20% of flour weight so the loaf still lifts well.
Hydration and crust style: Lower hydration (68–70%) produces a denser crumb that’s great for sandwiches; higher hydration (75–78%) encourages a more open crumb and a shattery crust. Bake covered longer for a thinner, crisp crust; uncovered longer for a thicker, rustic crust.
Dietary considerations: Sourdough’s long fermentation can mellow perceived wheat intensity for some people, but bread remains bread—enjoy within a balanced approach. If you’re reducing sodium, experiment with 1.6–1.8% salt; flavor will be lighter, and fermentation may run faster. For variety, try partial spelt or einkorn; both bring tenderness and distinctive aroma, though they call for gentle handling.
Storage, slicing, and leftover ideas
Cooling and slicing: Let loaves cool completely on a rack; cutting early compresses crumb and traps steam. Use a sharp serrated knife. For thin sandwich slices, chill the loaf briefly to firm the crumb, then slice and return to room temp before eating.
Short-term storage: Keep bread cut-side down on a board and covered with a breathable cloth for a day or two. Paper bags work better than plastic for crust preservation. If your environment is very dry, a loose bag can help retain softness; expect the crust to soften too.
Freezing: For longer storage, slice, wrap tightly, and freeze. Reheat straight from frozen in a 180°C (350°F) oven for 10–12 minutes, or toast slices directly. Whole loaves can be wrapped and frozen, then revived at 180°C (350°F) for 15–20 minutes; the crust re-crisps and the crumb warms.
Leftover transformations: Make croutons by tossing cubes with olive oil and herbs; bake until golden. Turn day-old slices into French toast or savory bread pudding. Dry ends for fine breadcrumbs; a quick toast intensifies flavor. No slice needs to go to waste—yesterday’s loaf is today’s pantry asset.
Putting it all together: a week-friendly schedule
Here’s a realistic, repeatable schedule for busy home bakers. Adjust by an hour or two to fit your day. The key is consistency—same flour, similar temperatures, similar timing—and notes. Over a couple of weeks, you’ll have a system that works in your kitchen with your gear.
- Evening 1 (20:00): Feed starter at room temperature.
- Morning 2 (07:00): Mix autolyse (flour + most water). Rest 30–45 minutes.
- Morning 2 (07:45): Add ripe starter and salt (with reserved water). Mix until cohesive.
- Morning 2 (08:00–11:00): Bulk ferment at 24–26°C (75–79°F). Perform 3–4 folds in the first 90 minutes. Stop folding once the dough feels strong and smooth.
- Late morning 2 (11:00): Pre-shape; rest 20 minutes.
- Late morning 2 (11:30): Final shape; place in a prepared basket.
- Late morning 2 (11:35): Proof 20–40 minutes at room temperature, then refrigerate 8–16 hours.
- Morning 3 (07:00): Preheat Dutch oven and bake. Cool and slice later in the day.
Checklist:
- Scale, scraper, basket, blade, baking vessel ready
- Starter ripe and predictable
- Autolyse performed
- Bulk fermentation observed by signs, not just time
- Shaping with tension, proof controlled
- Steam and heat plan clear
- Cooling and storage planned
With this cadence, you’ll bake delicious bread midweek without reorganizing your life. Keep your notes, adjust in small increments, and let the dough teach you. Before long, the aroma of a fresh loaf will be another regular rhythm in your kitchen.
