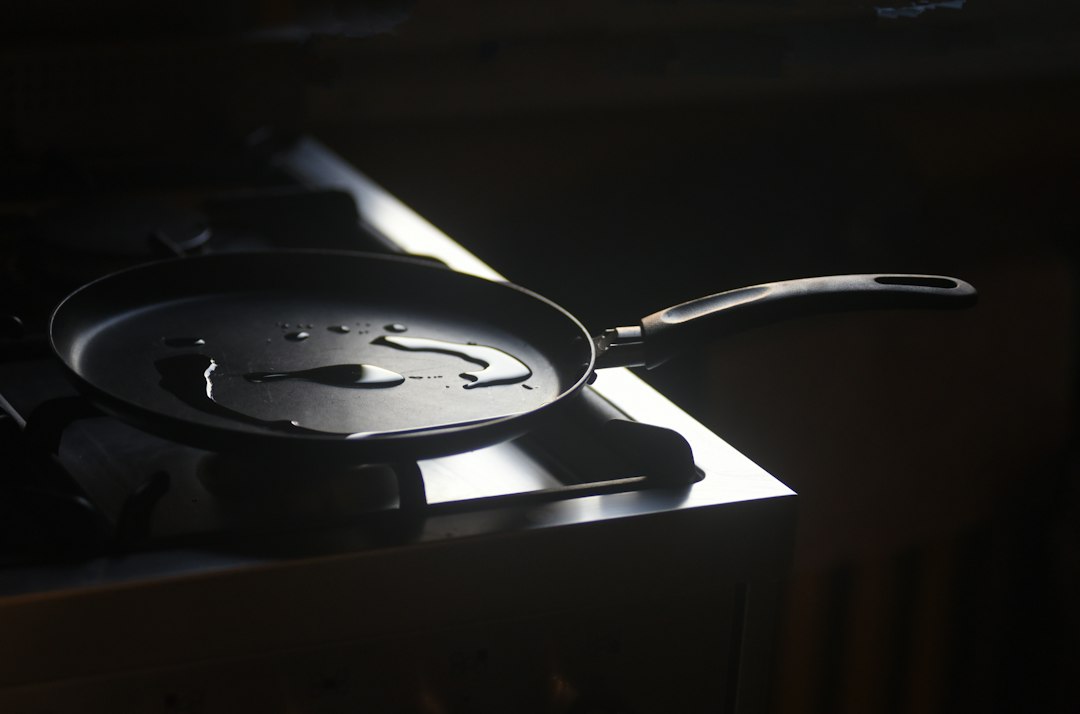
If you love durable cookware that rewards good habits, this guide to cast iron skillet care will earn a spot in your bookmarks. Whether you just unboxed your first pan or you are reviving a flea market find, the basics are simple: build a reliable seasoning layer, cook in ways that strengthen it, clean without stripping it, and store the pan so moisture never lingers. Done consistently, a cast iron skillet becomes a fast, even, and forgiving workhorse that lasts for decades.
Many cooks hear competing advice about oils, soap, and oven temperatures and end up more confused than confident. The good news is that there’s a practical, evidence-aware path that slots neatly into everyday cooking. You will learn why seasoning is a polymerized oil layer (not a mystical patina), how to read surface cues like stickiness and dull spots, how to correct rust without drama, and how to choose the right heat and oil for the food in the pan. You will also see checklists and side-by-side comparisons that make decisions simple in the moment, from choosing an oil to deciding whether to reseason.
Cast iron rewards the same mindset you bring to a sharp chef’s knife: steady care, not perfection. The following sections break down what matters, what doesn’t, and what to do next time the pan looks lifeless, sticky, or orange. Treat the whole routine as part of cooking, not a separate chore.
cast iron skillet care: the essentials
Before we dig into techniques, anchor three ideas that shape every decision you make with cast iron:
- Seasoning is polymerized oil, not grease. A thin layer of drying oil heated above its smoke point transforms into a hard, slick film that bonds to the iron. Thin and hot beats thick and cool.
- Water is fine, standing moisture is not. You can rinse, scrub, and even use a little soap. What ruins pans is leaving them damp in the rack or stacked without airflow.
- Heat management creates nonstick behavior. A properly preheated skillet plus the right amount of oil will release most foods easily. A cold pan with too much oil invites sticking.
With those principles in mind, a stable routine falls into place: warm the pan, cook, clean promptly, dry thoroughly, and apply a whisper of oil while the surface is still warm. That’s it. Every other tip in this guide supports that cycle.
Choosing your cast iron: sizes, shapes, and finish
Not all skillets behave identically. If you are starting from scratch or adding a second pan, think about your cooking style and stove:
- Diameter and weight: A 10–12 inch skillet is the sweet spot for most kitchens. Smaller pans heat faster and stress less on glass cooktops; larger pans hold sear space for steaks and vegetables.
- Wall and base thickness: Thicker pans hold heat better and recover faster after you add cold food. Thinner pans heat quicker and feel less punishing to lift. Both can excel; your choice depends on what you cook most often.
- Texture: Some vintage pans are smoother from factory machining. Many new pans have a light sand texture. Both can become silky with use. Do not chase a mirror finish as a requirement; seasoning is the main driver of release.
- Handle and helper handle: You will move a hot skillet often. A generous main handle and a stable helper handle make it safer to tilt, pour, and carry.
- Built-in pour spouts: Handy for draining fat or pouring cornbread batter without drips. If your pan lacks spouts, a silicone edge spout can help.
It is fine to start with an inexpensive modern pan. If you inherit or score a rusty pan, you can restore it to a high-performing tool with a little elbow grease and a sensible reseasoning cycle (detailed below).
Seasoning fundamentals: the science behind the slick
Seasoning is a hard, dry coating formed when a thin film of oil polymerizes on hot iron. Think of it as a plastic-like network that bonds to the surface. The quality of that network depends on:
- Oil type: Drying oils with higher polyunsaturated content build strong films. Grapeseed, canola, and sunflower oils are practical, widely available choices. You can also use refined avocado or rice bran oil. Many cooks like flaxseed oil; it can create stiff layers quickly but may flake if applied too thickly. Choose an oil you can use daily for both cooking and maintenance.
- Application thickness: The thinnest possible coat wins. If you can see any reflective sheen or oil pooling, you applied too much. Wipe on, then wipe almost all off until the surface looks dry.
- Temperature and time: You want to exceed the oil’s smoke point to start polymerization. In an oven, 450–500°F (230–260°C) for 45–60 minutes per coat works. On a stovetop, preheat until a wisp of smoke appears, then continue a few minutes.
- Oxygen exposure: Air plays a role in polymerization. In the oven, bake the skillet upside down with good ventilation. Place foil on a lower rack to catch any faint drips.
Seasoning builds like lacquer: many very thin coats are tougher than one thick coat. Over time, cooking itself adds micro-layers. Your goal is not a glossy black mirror on day one; it is a durable, matte, even film that slowly darkens and smooths with use.
How to season a new or stripped pan: step-by-step
Follow this sequence when you bring a new pan home or when you’ve stripped an old one to bare metal.
1) Prep the surface
- Wash with hot water and a small amount of dish soap to remove factory residue or stripping chemicals. Rinse thoroughly.
- Dry completely with a lint-free towel. Then place on a low burner for a few minutes to chase out hidden moisture from pores and seams.
2) Apply an ultra-thin coat of oil
- Put a teaspoon of your chosen oil in the warm pan. Use a folded paper towel to spread it across every surface: interior, sidewalls, rim, exterior, and the bottom. Don’t forget the handle.
- Use a clean towel to wipe the pan until it looks dry. If you can easily see oil, you will cook up a sticky layer.
3) Heat to polymerize
- Oven method: Place the pan upside down in a 450–500°F oven for 45–60 minutes. Ventilate the kitchen. Turn the oven off and let the pan cool inside to avoid thermal shock.
- Stovetop method: Heat the pan gradually on medium-high until a faint smoke appears from the surface. Keep it smoking lightly for 5–10 minutes, rotating the pan for even exposure. Let it cool on the burner.
4) Repeat 2–3 times
- Multiple whisper-thin coats beat one heavy coat. After two or three cycles, you should see a uniform, satin-like sheen.
5) Cook fat-forward recipes in the first week
- Sear burgers, fry potatoes, bake skillet cornbread, or roast chicken thighs. These foods deposit micro-layers that strengthen the film. Hold off on acidic and watery recipes for a few sessions.
What about pre-seasoned pans? Most arrive with a starter coat to protect from rust, but performance improves rapidly when you add your own thin layers. Treat a pre-seasoned pan like a new one: clean, apply a thin coat, heat, and cook.
Daily cooking habits that build release
Nonstick behavior in cast iron comes from three things you control: heat, oil, and patience.
- Preheat properly: Place the pan on medium heat for a few minutes. Test with a drop of water; if it dances and evaporates quickly, the surface is ready. For eggs or fish, aim for a slightly lower heat with a longer warmup.
- Use the right oil and amount: Add just enough oil to thinly film the surface. Swirl to coat. High-heat searing thrives on oils with robust smoke points; delicate foods like eggs prefer moderate heat and a touch more fat to fill surface microtexture.
- Let food release itself: Proteins stick at first, then release once the Maillard crust forms. If a steak grips when you try to flip it, wait 30–60 seconds and try again.
- Heat zones matter: On small burners, rotate the pan occasionally to avoid hot rings and cold centers. On induction, preheat gently to avoid scorching a thin spot.
Keep a simple script: warm the pan, add a little oil, cook with patience, and finish with a quick, thorough clean and dry. That ritual builds a sturdy film every week.
Cleaning without losing seasoning
The big myth is that soap “ruins” cast iron. A modest amount of mild dish soap will not strip a well-bonded film. What damages pans is aggressive scouring with steel wool every day, soaking for hours, or putting the pan away damp. Try this flow:
- Right after cooking: While the pan is warm (not blazing), pour off grease, then wipe with a paper towel to remove browned bits and excess oil.
- For easy messes: Rinse with hot water and scrub with a stiff nylon brush or a non-scratch sponge. A few drops of soap are fine.
- For stuck-on residue: Sprinkle kosher salt and add a teaspoon of water to form a paste. Scrub with a folded paper towel or a pan scraper. Alternatively, simmer a half-inch of water for two minutes to loosen fond, then pour and scrub.
- Dry completely: Towel dry, then place the pan on low heat for a minute or two. You should see the last moisture evaporate.
- Oil lightly while warm: Add a few drops of oil and wipe to a matte finish. The surface should not look wet or greasy.
Avoid the dishwasher, long soaks, and wire wheels. If you occasionally face a stubborn, sticky patch, do a short maintenance bake: wipe a micro-thin coat of oil and heat the pan in a 450°F oven for 30–40 minutes. That refreshes the film without a full reseason.
Rust, stickiness, and flaking: what to do
Most “disasters” look worse than they are. Here’s how to diagnose and correct common issues:
- Light surface rust: Looks like orange dust. Scrub with a non-scratch pad and hot water; if it persists, use a little baking soda paste. Dry thoroughly and apply a thin oil coat while warm. Cook fatty foods the next couple of sessions.
- Heavy rust: Patchy roughness or entire sections orange-brown. Use a vinegar and water bath (1:1) for 15–30 minutes to loosen rust, scrubbing and checking frequently. Don’t leave the pan submerged for long periods. Rinse, neutralize with a baking soda wash, dry fully, and perform the seasoning cycle from bare metal.
- Sticky surface after seasoning: You used too much oil or not enough heat. Strip the sticky area with hot water and a nylon scraper, then reapply a whisper-thin coat and bake it properly. On future coats, keep wiping until the pan looks nearly dry before heating.
- Flaking black chips: Often from thick, brittle layers (especially with very thick coats of certain oils). Scrub the loose material away. If flaking is widespread, strip and reseason with ultra-thin coats.
- Metallic or off flavors: Usually from insufficient seasoning on a new pan or harsh cleaning. Refresh with a light seasoning bake and cook neutral, fatty foods for a few sessions.
Most problems resolve with patience and thin coats. Avoid quick fixes that involve harsh abrasives on every clean. Use them judiciously only when necessary to remove rust or heavy residue.
Smart storage: oil film, airflow, and stacking
Storage is where many good pans lose ground. The goal is simple: discourage lingering moisture and keep the surface protected.
- Always store dry: After cleaning and a warm oil wipe, let the pan cool completely before the cupboard. Trapped heat can condense moisture in a closed space.
- Leave a protective film: An almost invisible coat of oil, buffed to matte, guards against humidity. If the pan feels greasy, you used too much; buff again.
- Manage lids: If your pan has a lid, store with it ajar or place a chopstick under one edge to allow airflow. Closed lids can trap humidity.
- Stack wisely: Place a paper towel, thin cork trivet, or pan protector between stacked pans to avoid scuffs. Heavy lids can mar the surface; store lids separately if space allows.
- Mind the climate: In humid regions or near the coast, consider a silica gel packet in the cabinet or a slightly more frequent light oil wipe.
These habits take seconds and pay off by keeping the surface stable month after month.
Troubleshooting quick reference (FAQ)
Keep this page handy for fast answers when something feels off.
- “My eggs stick.” Lower the heat, preheat longer, and use a touch more fat. Crack the eggs into the pan only when the oil shimmers. Start with less delicate recipes and build the film for a week, then return to eggs.
- “The pan smells smoky when I season.” That is expected. Ventilate well. If there is heavy smoke, you likely used too much oil. Wipe thinner before heating.
- “There are dull gray spots.” Those areas lack polymerized film. Wipe a thin coat of oil and heat, or cook a fatty recipe focused in that region to reinforce it.
- “Black residue transfers to towels.” Often normal after the first few sessions, especially if you cook dark-seared foods. It tapers off as layers harden. If residue is heavy, run a brief maintenance bake.
- “Can I use metal utensils?” Yes, with reasonable technique. Avoid digging and scraping at high angles. Flat metal spatulas excel for smash burgers and hash browns.
- “Can I use soap?” A small amount of mild dish soap is fine. Rinse, dry completely, and oil lightly while warm.
- “Induction or glass cooktop safe?” Yes. Lift rather than drag to protect glass. Preheat gently to avoid localized scorching.
Cast iron vs. carbon steel vs. nonstick: when to choose each
Each pan material shines in different scenarios. Here is how to decide which tool to reach for:
- Cast iron: Holds heat exceptionally well. Ideal for steaks, chops, cornbread, pan pizza, and roasting. It’s versatile from stovetop to oven to grill. Weight is the main tradeoff.
- Carbon steel: Thinner and lighter than cast iron, with similar seasoning principles. Heats and cools faster, making it nimble for sautéing and stir-frying. Needs the same cleaning and oiling habits. Slightly less heat retention than cast iron.
- Traditional nonstick: Unmatched for ultra-delicate tasks like omelets with minimal fat on rushed mornings. Not suitable for high-heat searing or metal utensils. Coatings wear over time and do not tolerate oven heat as well.
- Enameled cast iron: The enamel replaces the need for a polymerized film. Great for braises, soups, and tomato-based sauces. It is not the same as a bare cast iron skillet for high-heat searing, but it is a maintenance-friendly partner.
Many kitchens run with a small set: one cast iron skillet, one carbon steel pan, and one dedicated nonstick skillet. Choose by task and heat level.
Recipes that help seasoning (and a few to delay)
When building or refreshing a film, cook foods that naturally leave helpful micro-layers. Here are examples that support your routine:
- Best early recipes: Bacon, smash burgers, sautéed potatoes, roasted chicken thighs, skillet cornbread, grilled cheese, and fajita-style vegetables. These leave helpful fat and build confidence.
- Neutral practice: Quesadillas, pancakes, and flatbreads. Use a little extra fat if the surface is still new.
- Delay briefly: Very acidic, watery, or long-simmered dishes (tomato-heavy sauces, wine reductions, vinegar braises) when the seasoning is brand new. After a few weeks of regular cooking, you can make these successfully with mindful heat and fat.
- Mind sugar: Sweet glazes and caramel can stick on a fresh surface. If you do them, keep heat moderate and be ready with hot water to deglaze and clean immediately.
After each session, go through your quick clean, thorough dry, and warm oil wipe. Those steps convert great meals into a better pan.
Your maintenance schedule and simple checklists
Make care automatic with these lightweight schedules:
After every cook
- Pour off excess fat and wipe leftover bits.
- Rinse and scrub with hot water (a drop of soap if needed).
- Dry completely on low heat for 1–2 minutes.
- Add 3–5 drops of oil and buff to a matte finish.
Weekly quick audit
- Scan for dull spots, stickiness, or light orange freckles.
- If things look uneven, do a 15-minute stovetop refresh: thin oil, heat until faint smoke, cool, and buff.
Quarterly deep refresh
- If the pan looks tired or patchy, perform one oven seasoning coat (thin oil, 450–500°F for 45 minutes). One coat often restores an even, durable sheen.
Tools that make care easy
- Stiff nylon brush or non-scratch scrub pad.
- Pan scraper (rigid plastic) for fond and edges.
- Kosher salt for abrasive paste.
- Lint-free towels and paper towels for wiping and buffing.
- Chosen oil in a squeeze bottle (grapeseed, canola, or similar).
- Heat-proof gloves or a thick dry towel for moving hot iron.
Print the checklists and stick them inside a cabinet door. When care is part of the cooking flow, your skillet improves every week.
Advanced techniques: baking, searing, grilling, and campfire cooking
Once your pan is stable, expand how you use it. Cast iron is one of the few pieces of cookware that thrives in almost every heat environment.
- High-heat steak sear: Preheat the skillet for several minutes until the oil just begins to shimmer, then add a steak dried well and lightly oiled. Sear without moving until it releases, flip, and finish to your target temperature. For thick cuts, finish in a 450°F oven.
- Oven baking: Skillet cornbread, Dutch baby pancakes, and biscuit-sides bake beautifully thanks to even heat. Preheat the pan in the oven for 10 minutes for superior crusts.
- Grill and broiler: Use the skillet on the grill to sear scallops or protect delicate fish from grates. Under a broiler, keep a safe distance to avoid warping; preheat gently and watch closely.
- Campfire and coals: Cook over embers rather than roaring flames for even heat. A trivet or a ring of stones stabilizes the pan. Keep a brush, towel, and a small oil bottle in your camp kit for the same quick clean, dry, and oil routine.
After these high-heat sessions, the routine is the same: cool slightly, clean, dry, and buff with oil while warm. You are never more than a minute away from a protected surface.
Buying and restoring secondhand cast iron
Vintage and secondhand pans are rewarding. Here’s a sensible approach:
- What to look for: Flat cooking surface (no wobble), no cracks (inspect under bright light), manageable weight, and a handle you like. Rust and old seasoning build-up are fixable; cracks are not.
- Initial cleanup: Scrub with hot water and a non-scratch pad to see what you’re dealing with. For stubborn buildup, try a lye bath or a dedicated oven self-clean cycle carefully, then rinse and neutralize. Wear gloves and work in a ventilated area when using chemicals.
- Reseason from bare metal: Follow the step-by-step cycle above with thin coats. Do not rush; two or three coats plus fat-friendly cooking will transform the surface.
In a weekend, a rough pan can become a mainstay. The key is keeping each coat extremely thin and giving it proper heat.
Common myths and what really matters
Cast iron advice is full of absolutes. Here are some you can safely skip:
- “Never use soap.” Mild soap is fine in small amounts. The bonded film is tougher than you think.
- “Only one special oil works.” Many oils work. The thinness of the coat and the heat you apply matter more than brand or exotic options.
- “You should never cook tomatoes.” Once your film is established, you can cook tomato sauces. If the pan is brand new, wait a few sessions and use moderate heat and fat.
- “Rust means the pan is ruined.” Rust is reversible. Scrub, neutralize, reseason, and keep moisture away.
Focus on the fundamentals: thin coats, proper heat, thorough drying, and consistent use. Those levers make the difference long term.
Where to learn more and keep going
Once you have the routine down, keep an eye out for recipes that take advantage of cast iron’s strengths. Crispy potatoes, golden cornbread, seared fish with a delicate crust, and skillet pizza all shine with regular practice. For more kitchen how-tos and recipe ideas, explore the resources on LJ Life and keep experimenting in your own kitchen. Your skillet will get better every month you use it.
Build the habit, not the hype. Every time you warm, cook, clean, dry, and apply a whisper of oil, you are investing in a tool that will likely outlast the stove beneath it.
